

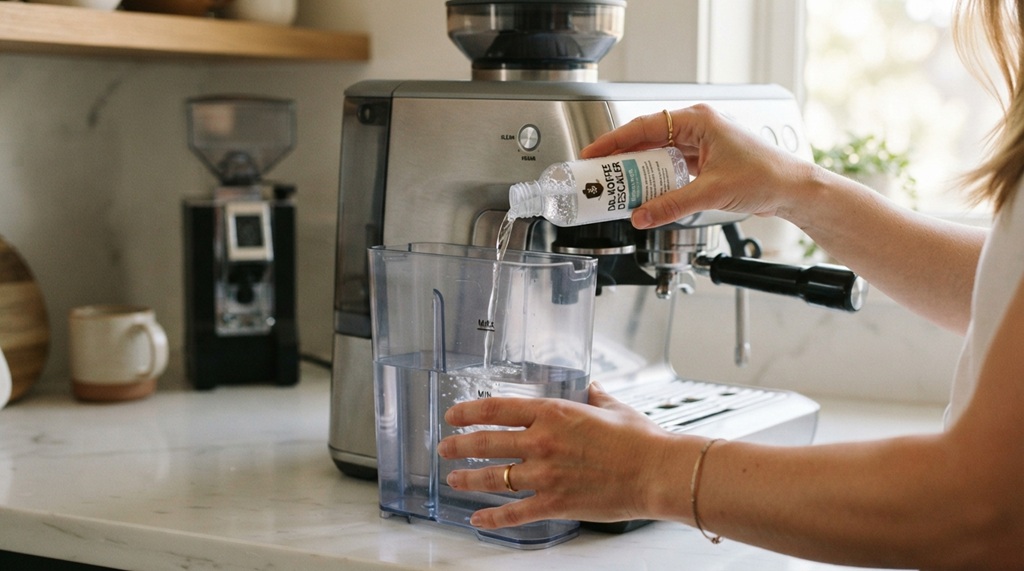
You can descale an espresso machine without damaging the pump by using the right descaling ratio, running short cycles, and never letting the machine run dry. Pump damage almost always comes from user error, not from descaling itself. Most people rush the process or use the wrong solution, and that’s what burns out a pump.
Read more: How to Descale an Espresso Machine Without Damaging the PumpThis guide breaks the process into clear steps. It also explains why pumps fail during descaling, so you can avoid the exact mistakes that cause it.
Whether you own a manual lever machine, a semi-automatic, or a super-automatic with a built-in grinder, the core principles stay the same. Small differences in machine type matter, and we’ll cover those too.
Why Pumps Get Damaged During Descaling

Pumps get damaged during descaling mainly from running dry, from solution that’s too strong, or from skipping the rinse cycle. The pump itself is a mechanical part. It moves water, not air. When it pushes air instead of water, even for a few seconds, it can overheat or wear down internal seals.
Running the Pump Without Water
This is the single biggest cause of pump failure during descaling. If your water tank runs empty mid-cycle and you keep pressing the brew button, the pump has nothing to move. It just spins and generates heat. Over time, or even in one bad session, this can crack seals or burn out the motor.
Using Undiluted or Overly Strong Descaler
Full-strength descaling solution is harsh. It’s built to dissolve mineral buildup fast, but that same strength can degrade rubber gaskets and O-rings inside the pump housing. Always dilute according to the product label, not by guesswork.
Preventing Pump Corrosion via the Essential Rinse Cycle
Skipping the final rinse cycle leaves residual, highly acidic descaling solution sitting inside the pump chamber, which silently corrodes internal metal components over time. A thorough freshwater flush isn’t merely an optional extra step—it is an absolute imperative to preserve your machine’s pressure dynamics and internal mechanics. While executing this targeted deep-clean safeguards your hardware’s long-term health, establishing a regular surface maintenance routine is equally essential to eliminate stale oil buildup and ensure exceptional daily extraction. For a step-by-step breakdown on optimizing daily cup clarity, explore on clean a coffee maker for better-tasting coffee.
What You Need Before You Start
You need a descaling solution made for espresso machines, fresh water, and about 30–45 minutes of uninterrupted time. Don’t substitute vinegar or lemon juice unless your machine’s manual specifically allows it, since many manufacturers warn against it.
- A citric-acid based descaler (check your machine’s manual for the recommended brand)
- Filtered or bottled water, not tap water if your area has hard water
- A large enough container to catch waste water
- Your machine’s manual, or the model number if you need to look up specs online
- A soft cloth for wiping down surfaces after
If you’ve lost your manual, most manufacturers post PDF versions on their support pages under your machine’s model number.
Step-by-Step: How to Descale Safely
Descale your espresso machine by mixing the solution to the correct ratio, running it through the system in short bursts, and following with two to three full rinse cycles. Here’s the full breakdown.
Step 1: Check Your Water Tank Level First
Before anything else, fill your water tank to at least the halfway mark. Never start a descaling cycle with a low tank. This single habit prevents most pump damage on its own.
Step 2: Mix the Descaling Solution Correctly
Follow the ratio printed on your descaler’s packaging. Most brands recommend one part descaler to anywhere from four to sixteen parts water, depending on strength. Stronger isn’t better here it just increases the risk to rubber seals and gaskets.
Step 3: Run Short Cycles, Not One Long Flush
Instead of holding the brew button down for a continuous stream, run the solution through in short 20–30 second bursts with pauses in between. This gives the pump a break and reduces strain, especially on machines with vibration pumps rather than rotary pumps.
Step 4: Let the Solution Sit (If Your Manual Allows)
Some machines benefit from letting the solution sit in the boiler for 10–15 minutes before flushing. Check your manual first, because not every model is designed for this step, and forcing it on the wrong machine can cause uneven heating.
Step 5: Flush With Clean Water, Multiple Times
This is the step people skip, and it’s the one that protects your pump long-term. Run at least two to three full tanks of clean water through the system after descaling. You’ll know it’s clean when there’s no smell or residue in the waste water.
Step 6: Wipe Down and Reassemble
Dry off the portafilter, group head, and any removable parts before putting the machine back together. Trapped moisture combined with leftover mineral residue can speed up future scale buildup.
How Often You Should Descale

You should descale your espresso machine every one to three months, depending on your water hardness and how often you use it. If you use hard tap water daily, lean toward the one-month mark. If you use filtered or soft water and brew occasionally, three months is often fine.
A simple way to check: if your machine has a built-in descale indicator light, trust it. If it doesn’t, listen for changes in extraction time water flowing noticeably slower through the group head is a common early sign of scale buildup.
Machine-Specific Tips (An Angle Most Guides Skip)
Not all pumps handle descaling stress the same way, and this is where a lot of generic advice falls short. Vibration pumps, the type found in most home espresso machines under $1,000, are more sensitive to dry-running than rotary pumps found in higher-end or commercial-style machines. If you own a machine with a vibration pump, the “short burst” method in Step 3 matters even more for you than it does for rotary pump owners.
Super-automatic machines with built-in descale programs are generally safer to use as-is, since the software manages timing and prevents dry pump activation. If your machine has an automatic descale cycle, use it instead of manually cycling the brew button the built-in program is calibrated to protect the pump.
Manual lever machines don’t have an electric pump at all in some cases, so this concern applies mainly to spring-lever or pump-lever hybrids, not fully manual models where you generate pressure by hand.
Common Mistakes That Shorten Pump Life
Most pump problems trace back to a handful of avoidable habits, not to descaling itself as a process.
- Letting the tank run dry mid-cycle and continuing to press brew
- Using descaler that’s too concentrated for the machine’s internal seals
- Skipping the rinse step and leaving acidic residue in the lines
- Descaling too infrequently, which forces the pump to push water through narrowed, scaled-up lines
- Mixing descaling brands or types not approved for your specific machine
Frequently Asked Questions
Can I use vinegar instead of a commercial descaler?
Some machines tolerate diluted white vinegar, but many manufacturers advise against it because the acidity level is inconsistent and can degrade rubber seals faster than purpose-made descaler. Check your manual first if it doesn’t mention vinegar as approved, stick with a citric-acid based commercial product.
Will descaling damage my pump if I do it correctly?
No. When you dilute the solution properly, keep the tank full, and rinse thoroughly afterward, descaling protects your pump rather than harming it. Scale buildup itself is a bigger long-term threat to your pump than a properly done descaling cycle.
How do I know if my pump is already damaged?
Common signs include unusually loud or grinding noises during operation, a noticeable drop in water pressure, or the pump running but no water coming through. According to industry experts and repair technicians, these symptoms often point to worn seals or air trapped in the lines, both common after a dry-running incident.
What happens if I forget to rinse after descaling?
Leftover descaling solution can leave a sour or metallic taste in your next few shots, and over time, the acidic residue can corrode internal metal components. Always run two to three tanks of clean water through the machine before making coffee again.
Is it bad to descale too often?
Descaling more often than needed won’t damage the pump directly, but it does mean more wear from repeated solution cycles and more time spent on maintenance than necessary. Stick to the one-to-three-month range based on your water hardness, rather than descaling every few weeks out of caution.
Conclusion
Descaling your espresso machine doesn’t have to put your pump at risk. The real dangers come from running the pump dry, using solution that’s too strong, and skipping the rinse. Keep your tank full, dilute your descaler correctly, run short bursts instead of one long flush, and always finish with a thorough rinse. Follow that routine every one to three months, and your pump should outlast the rest of the machine.
