

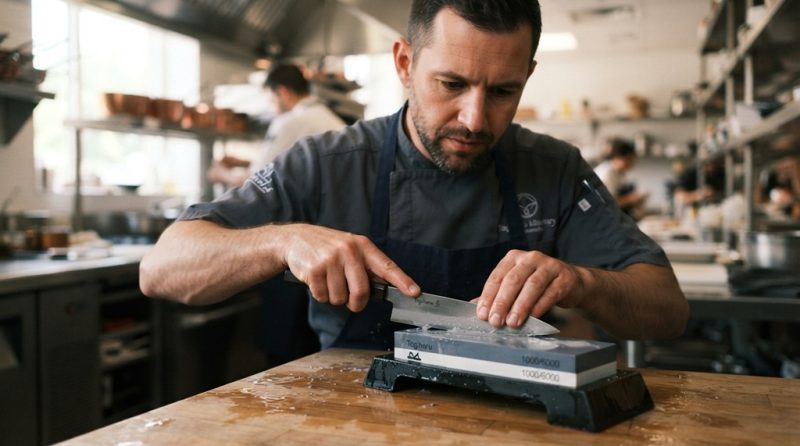
You can sharpen kitchen knives at home safely by using the right angle, the right tool, and steady, controlled strokes. A whetstone or a pull-through sharpener works well for most home cooks. The key is patience, not force.
A dull knife is more dangerous than a sharp one. It slips instead of cutting. It crushes food instead of slicing it. Learning to sharpen your knives at home saves money, protects your fingers, and makes every meal easier to prepare.
This guide breaks the process down into clear, simple steps. You don’t need professional training. You just need the right method and a little practice.
Why Sharpening Your Own Knives Matters
A sharp knife is safer and faster than a dull one. Dull blades need more pressure to cut. That extra pressure is what causes slips and injuries in the kitchen.
Professional chefs sharpen their knives often, sometimes every few days. Home cooks don’t need to go that far, but regular touch-ups keep knives performing well. According to industry experts, most home kitchen knives should get a light sharpening every one to three months, depending on how often they’re used.
Sharpening at home also saves money over time. Professional sharpening services can cost several dollars per knife. If you own five or six knives, that adds up fast. A one-time investment in a whetstone or sharpener pays for itself within a year for most cooks.
There’s also a quality benefit. Store-bought sharpening services vary in skill. When you sharpen your own knives, you control the angle, the pressure, and the final edge. You learn your knives better, too, which makes future sharpening faster.
Essential Tools for Precision Knife Care
Sharpening your kitchen knives like a professional requires the right balance of foundational tools and thoughtful maintenance accessories, with your choice ultimately depending on your experience and desired effort. While a high-quality whetstone or honing rod restores razor-sharp edges to your blades, true kitchen craftsmanship extends to how you care for your entire culinary workspace. After carefully washing and drying your freshly sharpened steel, maintaining a pristine prep station becomes essential; understanding to prevent kitchen mold near your sink and backsplash ensures your culinary environment remains as refined and hygienic as your tools.
Whetstones (Best for Precision)
Whetstones give you the most control and the sharpest results. They come in different grits, usually measured by numbers like 1000, 3000, or 6000. Lower numbers work faster on very dull blades. Higher numbers polish the edge for a finer finish.
Most home cooks do well with a combination stone that has a coarse side and a fine side. Soak water stones for 10 to 15 minutes before use, unless the packaging says otherwise.
Pull-Through Sharpeners (Best for Speed)
Pull-through sharpeners are the fastest and easiest option. You simply pull the blade through a slot a few times. These tools set the angle for you, which removes some guesswork.
They don’t give results as fine as a whetstone. But for daily maintenance, they work well and take almost no learning curve.
Honing Rods (For Maintenance, Not Sharpening)
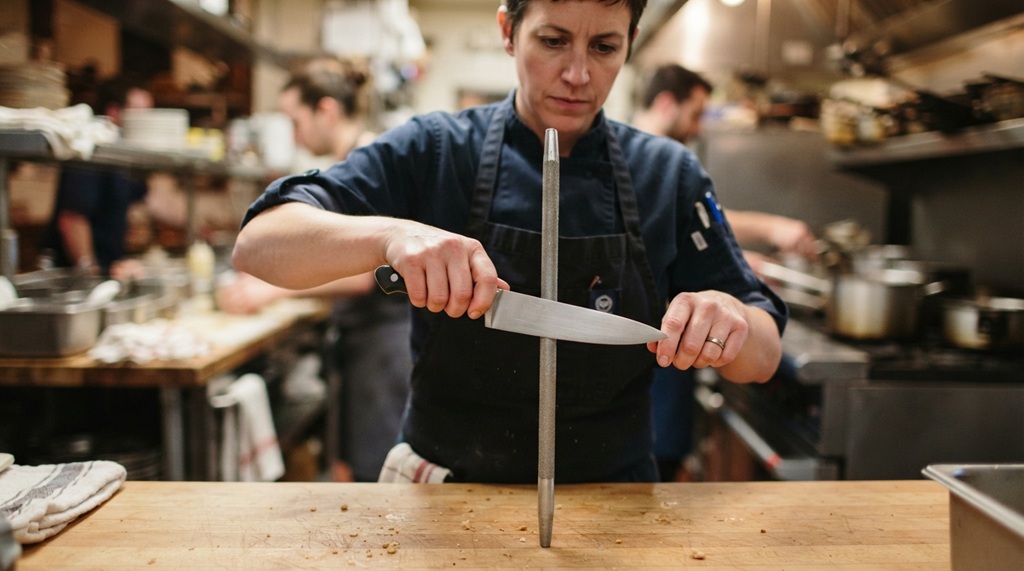
A honing rod does not sharpen a knife. It realigns the edge between sharpenings. Use it before or after each cooking session to keep the blade straight and performing well.
Many people confuse honing with sharpening. Honing keeps a sharp edge sharp longer. Sharpening actually removes metal to create a new edge.
Extra Supplies
- A damp towel or non-slip mat to hold your stone steady
- A small bowl of water (for water stones)
- A cutting board or towel to test sharpness safely
- Safety gloves, especially for beginners
Step-by-Step: How to Sharpen a Kitchen Knife with a Whetstone
Sharpening with a whetstone takes practice, but the steps stay the same every time. Go slowly on your first few tries.
1. Prepare the Stone
Soak your water stone for 10 to 15 minutes, or follow the manufacturer’s instructions. Place it on a damp towel or non-slip mat so it doesn’t shift while you work.
2. Find the Right Angle
Most kitchen knives sharpen well at a 15 to 20 degree angle. Western-style knives usually use 20 degrees. Japanese-style knives often use 15 degrees. If you’re unsure, 17 degrees works as a safe middle ground.
A simple trick: rest the blade flat on the stone, then lift the spine until you see a small gap. That gap is roughly the correct angle.
3. Sharpen One Side
Hold the knife at your chosen angle. Push the blade away from you in a smooth, sweeping motion, moving from the heel of the blade to the tip. Repeat this 8 to 10 times on the coarse side of the stone.
Keep steady, light pressure. Let the stone do the work instead of pressing hard.
4. Flip and Repeat
Turn the knife over and repeat the same motion on the other side. Use the same number of strokes to keep the edge even on both sides.
5. Switch to the Fine Grit
Move to the fine side of the stone and repeat the process with lighter pressure. This step polishes the edge and removes any rough burrs left from sharpening.
6. Test the Edge Safely
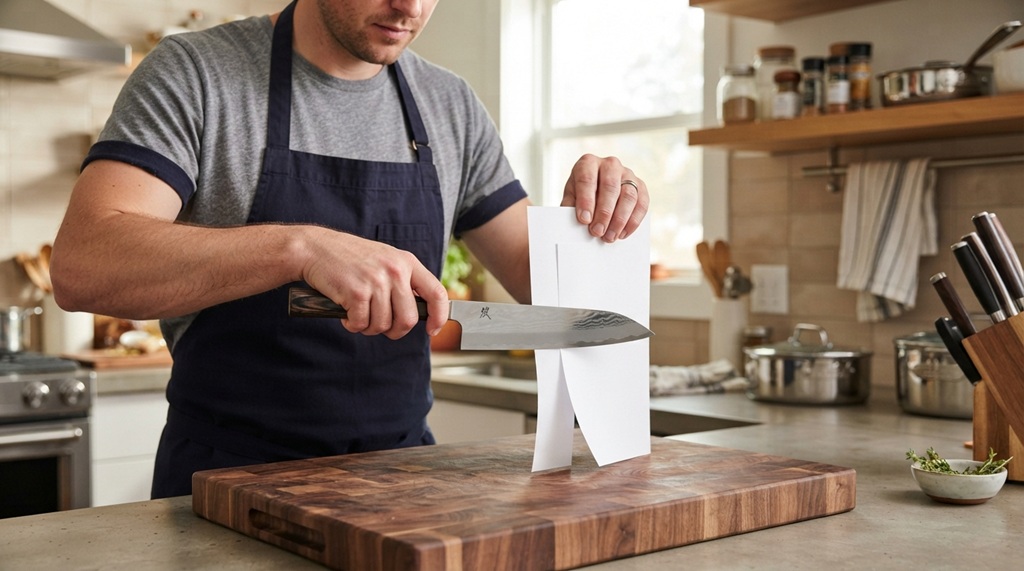
Don’t test sharpness on your finger. Instead, try slicing through a piece of paper or a tomato. A sharp knife glides through cleanly. A dull one tears or slips.
How to Sharpen Kitchen Knives Safely (Key Safety Tips)
Knife safety matters just as much as sharpening technique. A few simple habits prevent most sharpening accidents.
Always cut and sharpen away from your body, never toward it. This single habit prevents the majority of kitchen sharpening injuries. Keep your fingers curled and away from the blade’s path at all times.
Use a stable surface. A wobbly stone or sharpener increases the risk of slipping. A damp towel underneath your whetstone keeps it steady during use.
Go slowly, especially as a beginner. Rushing increases mistakes, uneven angles, and the chance of cutting yourself. Speed comes naturally with practice; it shouldn’t be your starting goal.
Store knives properly after sharpening. A sharp blade left loose in a drawer is a hidden hazard for anyone reaching in. Use a knife block, magnetic strip, or blade guard instead.
Common Mistakes People Make When Sharpening Knives at Home
Many home cooks damage their knives or get poor results because of a few avoidable mistakes.
Using the wrong angle. Too steep an angle creates a weak, thin edge that chips easily. Too shallow an angle leaves the blade dull even after sharpening.
Pressing too hard. More pressure doesn’t mean a sharper knife. It often removes too much metal and shortens the blade’s lifespan.
Skipping the honing step. Honing between sharpenings keeps the edge aligned. Skipping it means your knife dulls faster and needs full sharpening more often.
Sharpening every knife the same way. Not all knives need the same angle or grit. Serrated knives, for example, need a completely different sharpening approach than straight-edged chef’s knives.
Ignoring the knife’s steel type. Softer steels dull faster but sharpen more easily. Harder steels hold an edge longer but take more effort and skill to sharpen well. Knowing your knife’s steel type helps you set realistic expectations for how often it needs attention.
How Often Should You Sharpen Your Kitchen Knives?
Most home cooks should sharpen their main knives every one to three months, depending on how often they’re used. Knives used daily need more frequent sharpening than knives used a few times a week.
Honing, on the other hand, should happen much more often. Many chefs hone their knife before every use. This quick step takes seconds and keeps the blade performing between full sharpenings.
Pay attention to how your knife performs, too. If it struggles to slice through a tomato skin or crushes soft herbs instead of cutting them cleanly, it’s time to sharpen. Waiting too long between sharpenings makes the eventual sharpening session harder and removes more metal from the blade.
Frequently Asked Questions
Is it safe to sharpen knives at home without professional training?
Yes, it’s safe as long as you follow proper technique and safety habits. Start with a pull-through sharpener if you’re new to this, since it removes some of the guesswork around angle and pressure.
What’s the difference between honing and sharpening?
Honing realigns an existing edge without removing metal, while sharpening actually creates a new edge by removing material. Most knives need honing often but only need full sharpening every few months.
Can I use a whetstone on all types of kitchen knives?
Whetstones work well on most straight-edged knives, including chef’s knives, paring knives, and utility knives. Serrated knives need a specialized sharpener designed for their teeth instead.
How do I know if my knife is sharp enough?
A sharp knife slices cleanly through paper or a ripe tomato without tearing or crushing it. If the blade slips or requires extra pressure, it still needs sharpening.
What angle should I use for Western versus Japanese knives?
Western-style knives typically sharpen well at around 20 degrees, while Japanese-style knives often use a sharper 15-degree angle. If you own both styles, check your knife’s manual, since angles can vary by brand.
Conclusion
Sharpening kitchen knives at home isn’t as intimidating as it looks. With the right tool, whether that’s a whetstone, a pull-through sharpener, or a honing rod, and a few safety habits, you can keep your knives performing like a professional’s set. Start slow, practice the correct angle, and build the habit of honing regularly. Your knives, and your fingers, will thank you.
