

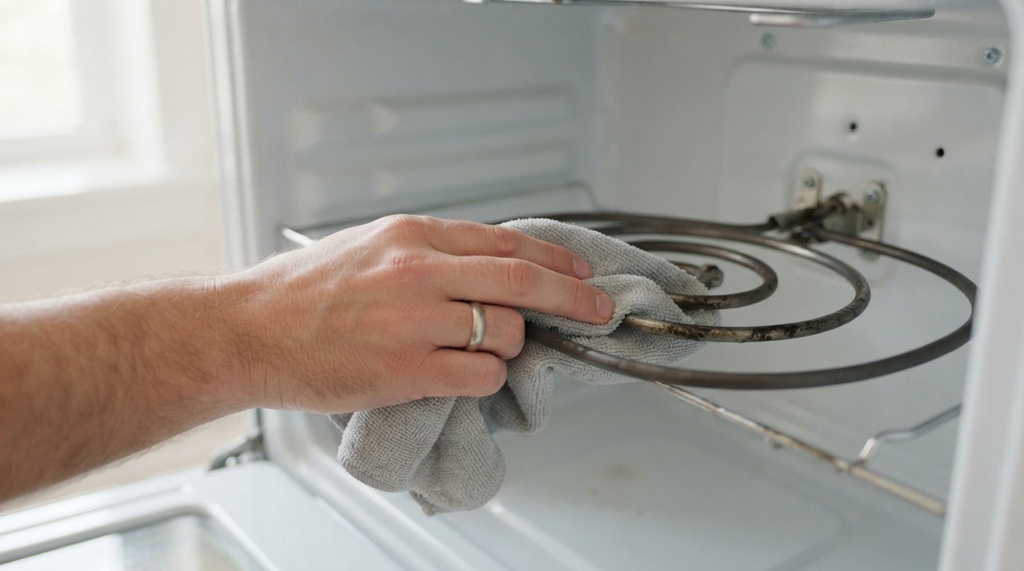
You can clean oven heating elements safely. Wipe down exposed metal parts with a damp cloth and mild soap. Keep water away from electrical connections.
Read more: How to Clean Oven Heating Elements Safely Without Ruining ThemThe trick isn’t scrubbing harder. It’s knowing which parts you can touch and which parts you should leave alone. Many people ruin their heating elements by soaking them or using harsh scrubbers. A few wrong moves can leave you with uneven heat, strange smells, or a broken oven.
This guide shows you the safe way to clean exposed and hidden heating elements. You’ll learn what tools work best and which habits to avoid.
Understanding Your Oven’s Heating Element Type
Not every heating element gets cleaned the same way. First, figure out what type you have. Ovens use one of two designs: exposed coil elements or hidden elements under a smooth surface.
Exposed Coil Elements
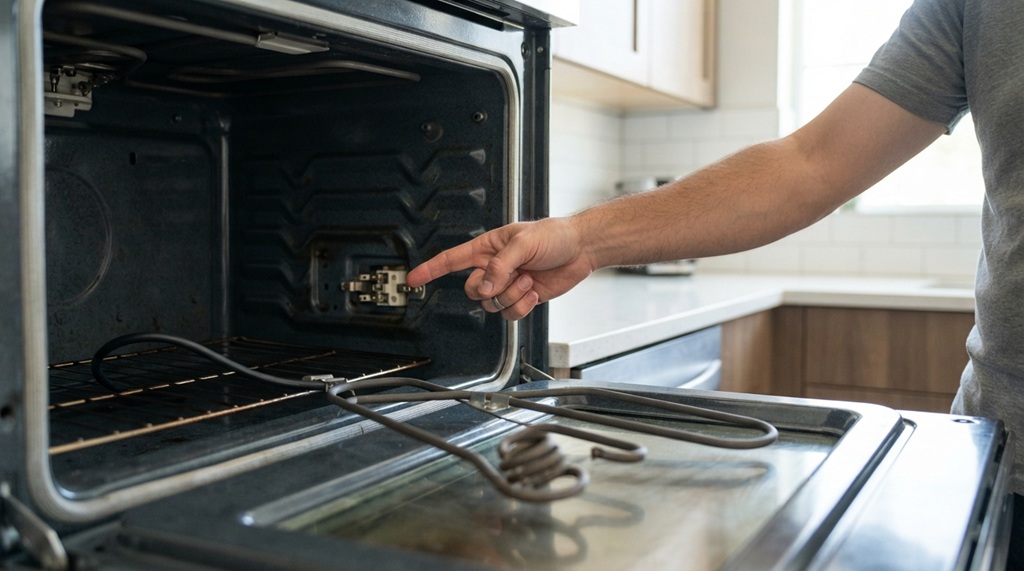
Exposed elements are the metal coils you can see and touch directly. You’ll usually find them at the bottom and top of the oven cavity. Many older electric ovens use this style. You can often unplug these coils from a small socket and lift them out to clean them.
Hidden or Concealed Elements
Hidden elements sit beneath a smooth, sealed oven floor. They never touch spilled food directly. If your oven has this design, don’t try to remove the panel. Never clean the element itself—stop at the smooth surface above it.
Check your oven’s manual or look inside before you start. Knowing your element type changes your whole cleaning approach.
What You’ll Need Before You Start Cleaning
A few simple supplies make this job easier. They also lower your risk of damage. You likely already have most of these items in your kitchen.
- A soft microfiber cloth or non-abrasive sponge
- Warm water and a small amount of mild dish soap
- Baking soda for tougher, baked-on residue
- A soft-bristled brush (an old toothbrush works well) for tight spaces
- Rubber gloves to protect your hands
- A dry towel for the final wipe-down
Skip steel wool, wire brushes, and heavy-duty degreasers. These tools scratch the element’s coating. They can also leave behind chemical residue that smokes when the oven heats up again.
How to Clean Exposed Coil Heating Elements
Cleaning exposed coils takes the most hands-on work, but it follows a simple sequence. Start with safety, then move to the actual cleaning.
Step 1: Turn Off and Unplug the Oven
Never clean a heating element while the oven runs or stays warm. Turn off the power at the breaker if you can. Wait until the element cools completely—this can take 30 minutes or more after use.
Step 2: Disconnect the Element (If Removable)
Many exposed coil elements lift up and unplug from a socket at the back of the oven cavity. Gently pull the element forward until you see the connection point. Unplug it carefully, then set it aside on a towel.
Step 3: Wipe Down the Coil
Dampen your cloth with warm, soapy water. Gently wipe along the length of the coil. Don’t soak the element or submerge it in water—moisture inside the coil can cause a short circuit or permanent damage.
Step 4: Handle Stubborn Spots Carefully
Mix baking soda with a small amount of water to make a paste for baked-on grease. Apply the paste directly to the tough spot. Let it sit for 10-15 minutes, then wipe it away with a soft cloth. Never scrape it with anything metal or sharp.
Step 5: Dry Completely Before Reconnecting
Let the element air dry for at least an hour. Or wipe it thoroughly with a dry towel before you plug it back in. A damp element causes most sparking problems and premature element failure.
How to Clean Around Hidden Heating Elements
A concealed heating element simplifies the cleaning process considerably, though it still demands a careful, deliberate approach. Since the element itself sits sealed beneath the oven floor, your task is limited to the smooth surface above it rather than the component underneath. Begin only once the oven has cooled completely, then wipe the floor with a damp cloth and a mild soap solution, working in gentle, even strokes to lift everyday grime. For baked-on spills that resist a simple wipe, spread a baking soda paste directly over the residue, let it sit for fifteen to twenty minutes to loosen its grip, and finish with a soft sponge rather than anything abrasive. Resist the temptation to pour liquid cleaner generously across the oven floor, as excess moisture can seep through vents or seams near the element housing and cause damage you won’t notice until the oven misbehaves later. A lightly damp cloth offers all the cleaning power you need without that risk, striking the right balance between effective and safe. If other appliances in your kitchen are giving you trouble alongside your oven, our guide on troubleshoot a microwave that won’t heat food properly walks you through the same kind of careful, methodical diagnosis.
Common Mistakes That Damage Heating Elements
Cleaning habits cause most heating element damage, not normal wear. These habits seem harmless, but they add up. Here are the mistakes that come up again and again.
- Cleaning a hot or warm element. Sudden temperature changes from cold water can warp or crack the metal.
- Using steel wool or abrasive pads. These scratch the coil’s protective coating, which leads to faster rusting and uneven heating.
- Soaking the element in water. Trapped water causes internal corrosion and eventually a short circuit.
- Spraying oven cleaner directly on the element. Many oven cleaners work for enamel interiors, not heating elements. Leftover residue can smoke on the next use.
- Skipping the dry step before reconnecting. Even a small amount of moisture at the connection point can cause sparking when you turn the oven back on.
Industry experts in appliance repair report that improper cleaning causes a large share of heating element replacements. A gentler approach really does extend the part’s life.
How Often Should You Clean Your Oven’s Heating Elements?
Most households only need a light wipe-down every one to two months. Your exact schedule depends on how often you bake or roast. If you spot visible spills near the element after cooking, clean it soon—don’t let the residue bake on repeatedly.
Frequent, light cleaning beats infrequent, heavy scrubbing. Residue that sits for months hardens and becomes harder to remove without abrasive tools. That raises your risk of scratching or damaging the element.
A Simple Habit That Prevents Most Buildup
Most cleaning guides skip this angle: place a drip tray or oven-safe liner on the rack below whatever you’re cooking. This catches grease and spills before they reach the heating element. You’ll scrub far less later.
This habit won’t remove buildup that’s already there. But it can cut down how often you need to clean the element at all. Over time, you’ll see less physical wear from cleaning and less risk of damaging the coil by accident.
Frequently Asked Questions
Can I use oven cleaner spray directly on the heating element?
No, avoid spraying commercial oven cleaner directly onto the heating element. These products work on enamel or ceramic surfaces. Leftover residue on the element can smoke or produce fumes when the oven heats up again.
Is it safe to remove and clean the heating element myself?
Yes, if you have an exposed coil element that unplugs easily. Just wait until the oven cools and turn off the power first. Don’t remove hidden or concealed elements—they aren’t built for at-home disassembly.
Why does my oven smell like burning after cleaning?
A burning smell usually means you left cleaning residue, food debris, or moisture on the element before turning the oven back on. Run the empty oven at a low temperature with the door cracked for ventilation. The smell should fade after one or two uses.
Can baking soda damage a heating element?
No, baking soda ranks among the safest options for cleaning heating elements. It’s mildly abrasive, so it won’t scratch the coating. Just rinse or wipe away the residue completely and dry the element before you reconnect it.
How do I know if my heating element is damaged rather than just dirty?
Look for visible blistering, cracking, or a section that glows differently than the rest when the oven heats up. If cleaning doesn’t restore even heat, or you notice sparking, call a technician instead of continuing to clean it.
Conclusion
Safe heating element cleaning comes down to a few core habits. Let the oven cool completely. Use gentle tools instead of abrasives. Keep water use minimal. Always dry the element fully before you reconnect it.
Whether you have exposed coils or a hidden element under a smooth floor, the same principle applies: patience and a light touch protect the part far better than aggressive scrubbing. Add a simple habit like using a drip tray, and you’ll keep your oven heating evenly for years without needing a replacement.
